Categories
Info and News

Ready for Touring

Yesterday I received the schedule for the Tohoku tour. We’ll be doing 20 shows, workshops, and playtimes at 11 schools in Ofunato, Otsuchi, Kamaishi and other communities along the Iwate coast. Guy, Keiko, and I will see over 700 kids in five days.

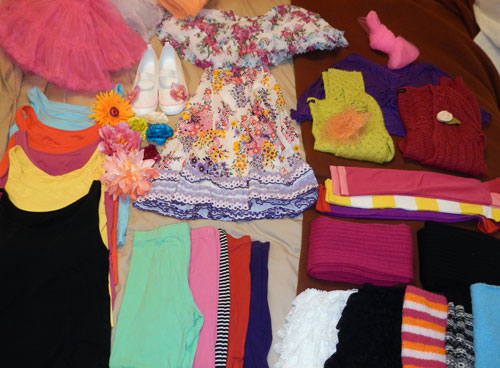
This is incredible and I am so…ready! Guy called me “overprepared” in our tour meeting yesterday. Yes, I think I might be. I have a resource book of games and activities (which I will share online when I return) , 107 hula hoops, two playlists, and four tutus. Check out my costume stash:

Thanks to everyone for their support and good wishes as we’ve gotten all of this together. My plan is to snap some photos as I can and to report in from the road, so check back next week for updates. I’ve got to sign off now, I have a little more preparation to do…

Categories
Info and News WHD Dance

Teaching at Hoopcamp in September

From September 26-30, I will be among the instructors at Hoopcamp, one of the biggest and most loved hoop events on the planet. I’ll be leading a session on the WHD Dance 2012, including tips on how to teach the dance and a variety of modifications and other ideas.

If you are in Tokyo, be prepared for some free workshop sessions. I hope to have the choreography sorted out by June and will need some happy volunteers to learn it  and give me feedback so that I can figure out how to teach it best. This means we are going to have more than six months to prepare our dance for the 2012 World Hoop Day event.  Let’s rock it!

From a personal perspective, I am simultaneously thrilled, humbled and scared to pieces to be part of Hoopcamp’s program. I attended in 2010 and was blown away by being with 500 other hoopers and totally immersed in classes and new ideas. I am excited to share this year’s WHD Dance and bring it to an even bigger audience and I hope that my part in the program will give people a fun choreography to share with their hoop groups when they return home. Even more than that, I am eager to learn from the world’s best hoopers who will be leading workshops, demos and discussion sessions for four days straight. I don’t count myself among the world’s best hoopers, but there I am in the lineup. My ego is really confused.

Categories
Materials & Essays

A Tutorial on Hoop Tutorials

Hula hoop trick and movement tutorials are the key to our online community sharing its knowledge. Some tutorials are incredibly good, others are unfortunately difficult to watch due to technical failures, poor editing, or bad planning.

I’ve been a hooper since 2008, but a video producer/editor since 1995 and an educator for even longer than that. I have made scores of educational videos and tutorials.  I have some opinions about what makes a tutorial video great:

Filmed in good light with clear sound and an awareness of surroundings and distractions, the teacher knows her topic. The tutorial begins with a view of the goal. The material is explained using at least two learning modalities (visual, auditory, reading, etc). Teacher and editor know where to place emphasis in the tutorial – more time on the tricky parts, less time on the credits. The footage is filmed with the final video in mind and edited with an eye for brevity and clarity.  Overall the tutorial teaches the topic well and offers inspiration beyond the material.

Video projects have three stages: pre-production, production, and post-production. These are fancy filmish ways of saying planning, filming, and editing. Let me walk you through some of the points in each stage that you can consider for your next tutorial.

Pre-Production (Planning)

  1. What move are you teaching? Can you do it smoothly for the camera? If not, keep practicing or choose another move for your tutorial.
  2. How will you explain the material? What are you going to say?
    • It’s a good idea to “say what you’re going to say, say it, then say what you said” to reinforce the learning. In a hoop tutorial, that means a demonstration of the move, the instruction, and another demo at the end.
    • You might go as far as writing a script, or maybe you prefer to simply think through the main points. Personally, I like cue cards or notes.
    • It’s smart to practice your patter, especially if it’s your first time teaching or working on camera.
    • You can keep it short by paring the explanation to the basics, or make it longer by micro-explaining.
    • Consider your audience – beginners may need details about everything but if you are teaching an advanced move, it’s ok to assume some knowledge.
  3. Scout your location.
    • Do you have enough room? If you aren’t able to do the move in its full expresion, everyone will learn to do it wrong. Caroleeena once did a tutorial where the hoop was accidentally tapping the ground – now everyone taps the ground when they do the move, even though that wasn’t meant to be part of the move. Remember that your camera needs space, too, or you’re going to cut off your head or feet in the shot.
    • Make sure there is light. Indoors:  You want the light source in front of you, not behind you, so don’t stand in front of a window even if the view is spectacular. Frame the shot so no light fixtures are in it; these will mess up the automatic systems in your camera. Outdoors: you want the sun in your face or less than 45 degrees to your side. A slightly overcast day is good. Dappled light from leaves makes it harder to see the action.
    • Avoid distractions. Try not to have too many people moving or making noise in the background. If you’re filming indoors, it’s smart to remove clutter from the space behind you. Maybe the puppy needs to be in another room.
    • Consider the color of your hoop, surroundings, and clothing. You want some contrast so people can see clearly.
  4. Check your gear. Can your microphone pick up the sound of your voice? Is your location noisy or windy? If you can’t get clear, loud audio, consider doing a voice over with the explanations. Does your camera capture the motion smoothly? You may need to adjust frame rates or other settings.
  5. Find a tripod or stable platform for the camera. Keep the camera still when your hoop is moving. The more motion you add to your video unintentionally (via handheld jitter, wind rustling through leaves, cars speeding past, etc.) the crappier your video will look when it’s compressed on YouTube.
  6. Recruit a crew. You can film solo, but having one or two people to help will allow you to focus on teaching and not worrying about whether you were in frame. Someone to man the camera, another to hold cue cards, maybe?

Production (filming)

  1. Plan on doing two takes, at least. This will give you options when you are editing. On the other hand, too much footage takes forever to review. Strike a balance between “let’s do that again” and “let’s move on.”
  2. You don’t have to film in sequence. Go ahead and do the intro last, or get all the closeup shots at once. That is why we edit.
  3. You don’t have to film continuously. Short shots can be pieced together to tell the whole story. Change angle or view (close up, full body, etc) of each take to make the edit look professional.
  4. Keep up your energy. Do your best to maintain a similar tone through the whole video and every take. Give yourself breaks as needed. Have snacks and drinks ready if your shoot is going to run long.
  5. Shots to get (not necessarily all of them):
    • Demonstrate the move. Let the audience see what you’re going to teach them. Film the move in flow and also as a stand-alone move.
    • Introduce yourself and name the move. “Hi, I’m Kristen from Spin Matsuri and today I’m going to show you how to do the Twisty Fumble Super Hop”
    • If there are prerequisites to this move, list them. “You’ll need a hoop small enough to fit between your legs, and you also need to be able to do a jump-out from your neck, so if you haven’t got that down yet please check out my “neck jump-out”  tutorial first.”
    • Break it down step by step.  This is especially key in a sequence of moves. Don’t fail to mention grip, transitions, the hand you’re using, and hoop direction.
    • Talk it through, but if your camera microphone is weak or you are in a noisy area, consider keeping your mouth closed, showing each step silently, and doing a voice over afterwards.
    • Slow the move down either by doing it slowly as you are filming or in slo-mo when you are editing.
    • Show it from different angles. Turn your body or move the camera.
    • Get in close. If you need to demonstrate a grip or another sort of detail, use a close up.
    • Film some “b-roll” – extra bits to tuck between shots. Could be your feet while doing the move, your smile, an extreme closeup of the hoops moving. B-roll comes in handy when editing.
  6. Troubleshoot and give some tips. Explain what to do if it isn’t working. “If the hoop gets caught on your ear, try turning your face more forward before hopping through. I like doing this move as a transition between the Triple Hyperwave and the Shimmy Slot.”
  7. Demonstrate any variations or transitions in and out of the move to give ideas to your precocious students.

Post-Production (editing)

  1. Titles. Keep them short and sweet. Viewers are going to watch your video repeatedly to learn the move; don’t make them sit through a long animated introduction every time.
  2. Credits. All on one screen, if possible, for the same reason as short titles.
  3. Basic editing sequence for a tutorial: title, demonstration of move, tutorial in detail (break down, slow-mo, close-ups, alternate angles), tips and troubleshooting, demo in flow or variations, credits.
  4. Add annotations, subtitles, arrows, and diagrams as necessary. They can be effective in drawing attention to the details and they incorporate another learning modality.
  5. Cut, don’t fade.  Put the clips together in order and see how it looks.  99% of the time, you don’t need fancy transitions in tutorials. Save them for your story videos.
  6. If cutting together two similar shots, viewers will not notice a jump or disconnection if you use shots that were taken from different angles or put b-roll between shots taken form the same angle.
  7. Use music sparingly. Unless you are teaching a choreography, you can skip the BGM. This also avoids potential copyright and licensing issues.
  8. Trim away the excess. Seeing the teacher getting into position in front of the camera is not required for the tutorial. Chop it out.
  9. Edit at maximum size and let your video host do the final compression. Give YouTube (or Vimeo or whoever) the best quality you have.

That said, I don’t always follow my own advice. I’ll film in on a whim in my pajamas on the cramped balcony with the camera precariously balanced and my husband rattling around in the kitchen and then I’ll throw the result onto YouTube without editing. This does not create a really great tutorial, no matter how awesome my intention may be.  Do what I say, not what I do. 😉

Categories
Info and News

107 Hoops for Tohoku

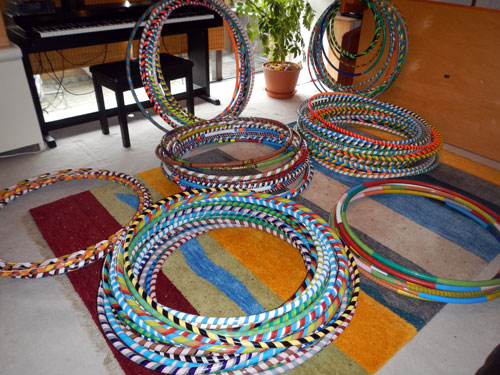
Here are the one hundred and seven hoops that will travel to Tohoku. Early next week, I will ship them to Iwate-ken by takyubin, and I will follow them on the 19th for a week-long tour with Guy Totaro and Keiko Fujimoto. We are staying in Ofunato and travelling by car to over a dozen schools where I will join in performances, hold workshops and give away our hoops. The Tyler Foundation’s Smile Ambassador program generously provides transportation, accommodation, and all the organization for this trip. All I have to do is show up with our hoops and fit into the performance schedule with Guy and Keiko.

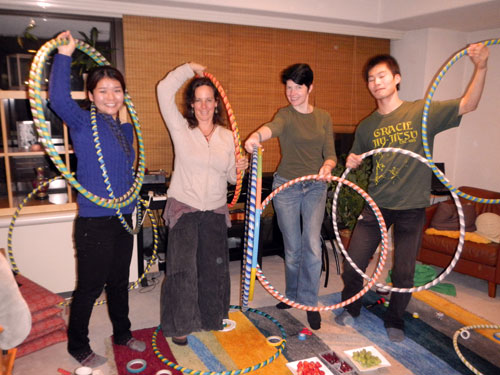
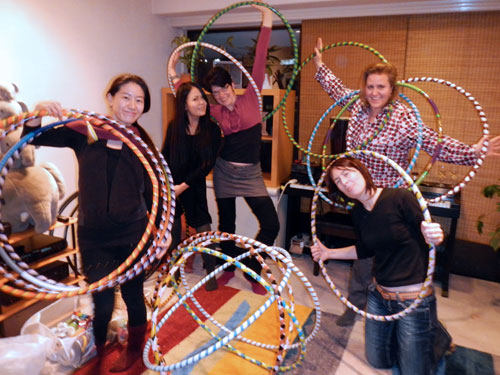
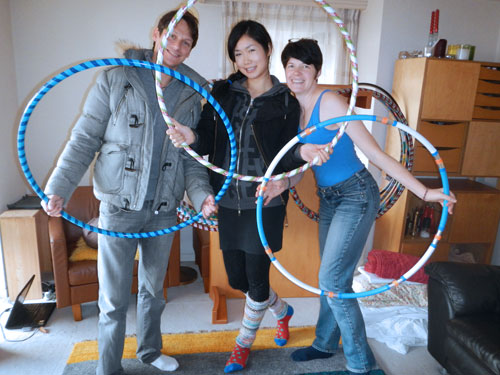
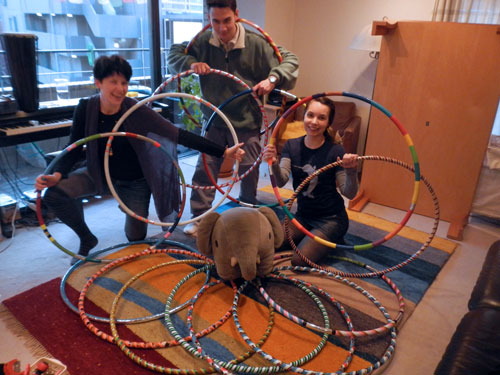
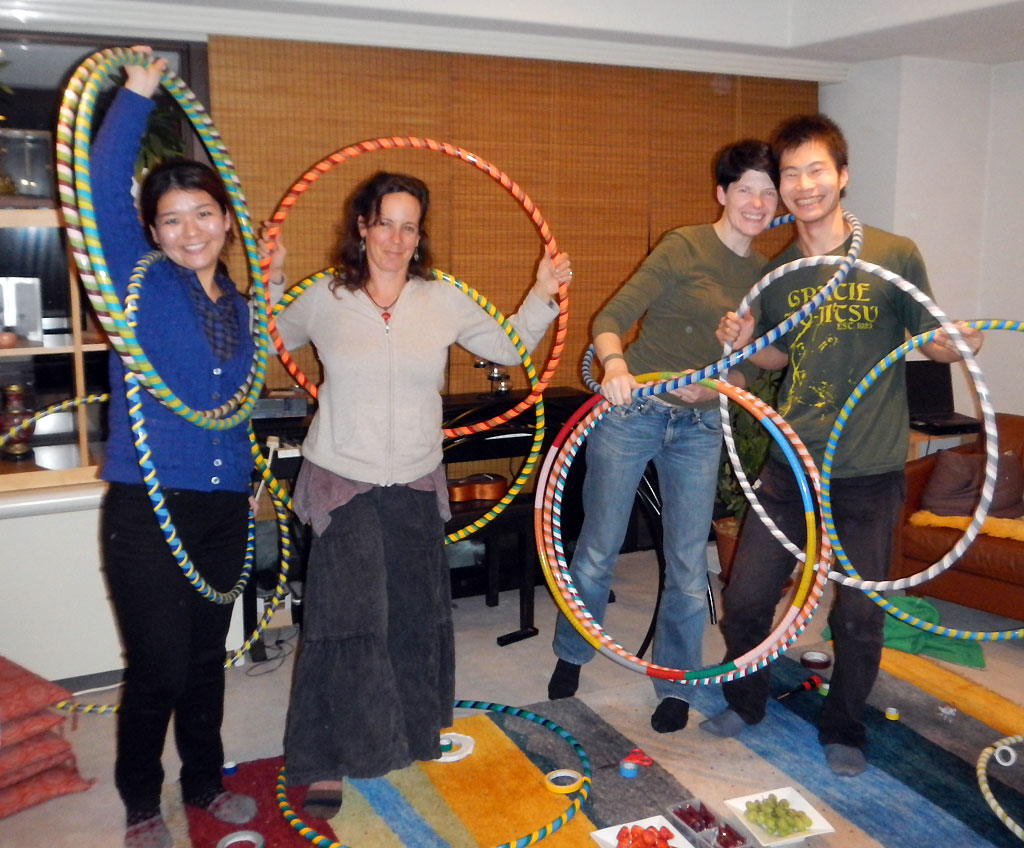
All of these hoops were made with donations collected at World Hoop Day on 11/11/11, and lovingly constructed and decorated in four Hoop Factory sessions, as well as on World Hoop Day itself. Here are our triumphant post-factory photos:


Naomi, Rachel, me, and Masa. 15 hoops.


Yuko, Rie, me, Trine, and Alexie. 17 hoops.


Sebastien, Kana, and me. 17 hoops.


Me, Chaobang, Tijana, and Zousama. 15 hoops.

Thank you all for sharing your time and creative energy and for donating money to WHD to buy supplies. There will be more hoop making in our future – next time for Peace Boat. Stay tuned.

Categories
Info and News

Hoop Supplies in Japan

Finding hoop-making supplies in Japan has taken lots of research, trial and error, plus great tips from hooping friends. I want to share my resources with you so can get your own hoop factory started. If you have any tips about alternate supplies or resources, please share them in the comments!

テープ Tape

ビニールテープ Colored Vinyl

Vinyl tape comes in many colors and is inexpensive. Standard roll size is 10m and 19mm wide. One roll will cover an 80cm hoop if you tape neatly.

  • Online vendors are convenient for large orders – tape is heavy to haul around town. I use Rakuten for my online shopping, but Yahoo and Amazon also have tape.
  • ダイソ Daiso sells only primary colors, but at 3 rolls for 100 yen, you can’t go too wrong.
  • Local hardware stores carry a range of basic colors and some shops have the pastels ones, too.
  • The most difficult color to find is purple.  This is the stuff to search for: ヤマト ビニールテープ NO.200-19 紫 There is also a 3M brand purple tape; it is about 500 yen/20m roll.

ガッファーテープ Gaffer

Gaffer tape is made of fabric; we use it to add grip to our hoops.

キラキラとデコ Shiny & Fancy

To glitter and shine your hoops, fancy and shiny tapes are fun but a little hard to get. Beware of tape without adhesive that is used for streamers at parties and events. It comes on rolls and looks exactly like adhesive tape but should say 粘着加工はしておりません on the label.

  • フープ東京 Hoop Tokyo has a range of styles and colors. http://shop.hooptokyo.com/
  •  ダイソと100円店 Daiso & 100 yen stores. It’s a bit hit or miss, but sometimes you’ll find unique deco tapes, including thin metallic tapes.
  • Tokyu Hands, art stores, and stationers sell “cutting sheet” which is self-adhesive colored vinyl by the meter. It can be cut to any width strip for taping hoops and comes in a variety of colors, including holographic patterns.
  • Hardware stores carry adhesive vinyl shelf papers in matte patterns and colors. Can be cut into strips for hoop tape.
  • Identi-Tape. Based in the US. Wide variety and great prices on tape; shipping can be expensive. http://www.identi-tape.com

パイプ Pipe

ポリエチレンパイプ PE Pipe

1/2″ recycled black polyethylene is soft and flexible. Good for springy hoops no larger than 90cm. This is the pipe was are using to make charity hoops for Tohoku and the Peace Boat. It’s economical, only 9000 yen/120m roll, but you must buy two rolls or more.  http://www.omn.ne.jp/~do/per.html PER-12 内径16.1mm×120m

架橋ポリエチレン管 PEX tubing

is stiffer than PE, so it makes good hoops for off-body, breaks, and larger size hoops. There are several Japanese manufacturers, including ONDA and Sekisui. The standard sizes we use are 13A (17mm OD) and 16A (22mm OD). 100m of 13A costs about 15,000 yen. http://www.meguro-seiwa.com/shop/25.html

パーツ Parts

  1. コネクター Connectors can be made from a range of materials – from pipe to wood dowels to wine corks. The key to a good connector is a tight fit. Check the inner diameter (ID) of the hoop pipe to help you find the right size. If your connector is too small, try wrapping it with vinyl tape.
    • ホワイト丸パイプ White Maru Pipe is stiff and suitable for rivet closures with PEX pipes. It has a tendency to crack with heavy use. Number 15 fits into PEX 13A; 18 fits 16A.
    • Insert connectors. I have yet to find these PVC treasures in Japan.
  2. ブラィンドリベット Blind rivets can be found in nearly any hardware store. I use  ones with an aluminum flange and steel shaft, diameter 2.4mm and length 3.2-6.4mm. Any rivet long enough to fit through both your hoop pipe and connector will work. Make sure you have a drill bit of the correct size.
  3. 樹脂チューブカッタ Ratcheting pipe cutter is a key tool to making tidy cuts in your pipe. They cost about 2500 and are a wise investment if you are going to make a lot of hoops.

Ready-Made Hoops

If you simply want to decorate hoops, I recommend buying “color rings,” which are basic school hoops. The 90 cm size is pretty good for most adults; the 80s make nice twins. Although they are rather light, tape will add weight to them. They are very durable (mine lasted over three years of hoop jams and frequent use) with heat welded connections. I get mine 5 at a time from a vendor on Rakuten, but you can sometimes find them individually at Tokyu Hands or sports stores. 5 piece set of 90cm hoops, 6500 yen. http://item.rakuten.co.jp/rokusen/g2193/

Categories
Info and News

15 New Hoops for Tohoku

Last night we gathered in the Hoop Factory (which is my living room) to make hula hoops and enjoyed a productive time cutting, connecting, and taping. We also snacked and chatted. Our final count for the night was 15 hoops completed.

Now a mathematical word problem. If five people work for 3 hours and make 15 hoops, how many people are needed to make 65 hoops in 7 hours? Whatever the answer is, that’s the number of people we’ll need to finish the hoops in the next two Hoop Factory sessions on 1/27 and 2/4. Hope to see you there.

Categories
Info and News

Japan in the 2012 Hoopie Awards

I will be validating the votes for the awards, but I think it is OK for me to encourage you to go over to Hooping.org and vote for your favorite videos, hoop events and hoopers in the 2012 Hoopie Awards.

I’m pleased to see Tokyo represented twice in the nominations. In the Solo Video of the Year category, Roon Roon’s Hooping in Tunisia video is up for an award. It features Roon Roon’s fluid sustained spinning and if you haven’t seen it yet, have a look:

[youtube http://www.youtube.com/watch?v=AwMSjj2RPW8]

And Tokyo, Japan is nominated for Hoop Community of the Year. That’s you! Us! I’m very happy for this recognition , especially when we consider all the amazing things we did together in 2011.

[youtube http://www.youtube.com/watch?v=yNrDdflPzIQ]

[youtube http://www.youtube.com/watch?v=SkI4hkk6rZY]

[youtube http://www.youtube.com/watch?v=22AaXzeZM9I]

You have only until Thursday, January 19th to cast your votes in all categories, so don’t wait too long to decide who to vote for – whether it’s our Japan-based nominees or any of the other amazing hoopers who are in the running.

Categories
Info and News Workshops & Events

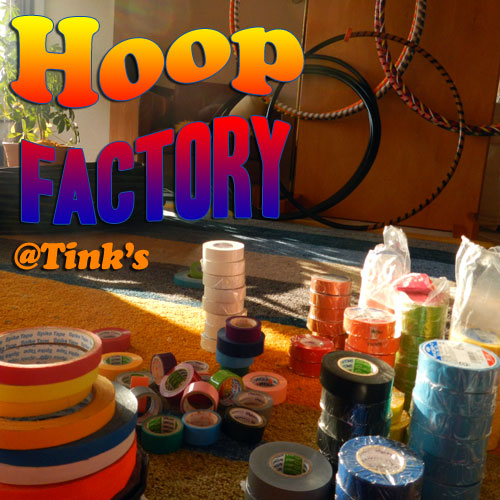
Hoop Factory @ Tink’s

With a goal of creating 80 hoops before 14 February, I am reaching out for your help. Would you like to learn how to make hoops? Play with tools and tape? Spend a few hours to bring some smiles to Tohoku next month?

Three “Hoop Factory @ Tink’s” events are scheduled and you’re welcome to attend one or all three – drop in after work or pop over on the Saturday. You don’t have to be here the whole time, but plan on staying at least an hour.

Tuesday, January 17. 6pm – 10pm
Friday, January 27. 6pm – 10pm
Saturday, February 4. 1pm – 6pm

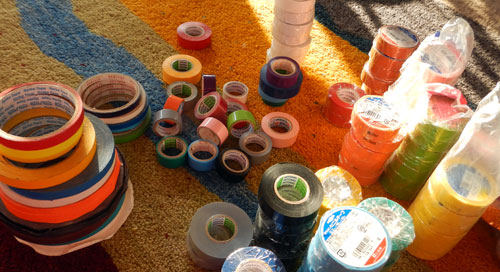
What happens in the hoop factory? First we measure and cut pipe, then we prepare connectors and form the pipe into hoops. Then we decorate the blank hoops with tape.

The hoops we make in these sessions will travel with me to Tohoku for a week in mid-February, where I will be participating in the Smile Ambassador program in local schools. Each group will receive a gift of hoops, so the more hoops, the better.

If you can attend any of these sessions, please contact me via e-mail for details and directions, or RSVP on Facebook.

Categories
Info and News

240 Meters of Hoop Pipe

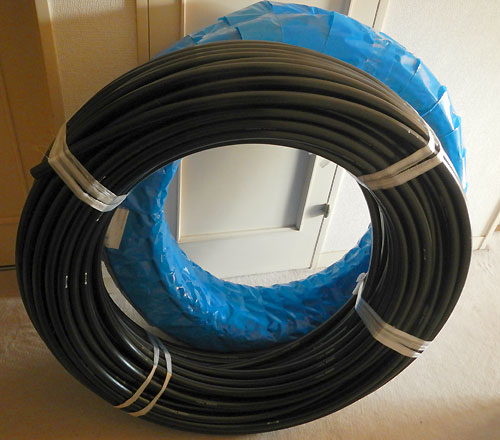
Meet the hoop pipe that your World Hoop Day donations purchased. We have enough to make about 80 hoops right here. Connectors are coming in the next few days. Let the hoop-making begin!

This batch of hoops will be going up to Tohoku for the kids in schools where there’s not a lot of room to play outdoors. I’ll be delivering them in February along with Guy Totaro  and Keiko Fukumoto as part of Tyler Foundation’s Smile Ambassador program.

I’m excited and honored to be doing this work to spread hoop joy to people who really, truly need it. Thank you to everyone who donated to make this happen – and to everyone who’s going to help me get these hoops made!

Categories
Info and News

Calculating Your Ideal Hoop Size – A New Way

Hula hoops come in a range of sizes and weights. How can you decide which is right for you?

The common wisdom advises beginning hoopers to choose a hoop that reaches from the ground to their navel or higher. But does that rule of thumb make sense? Hoops are more often around our  waists than standing at our legs.

We also know that the bigger the hoop is, the longer it takes to rotate all the way around on your waist, so you can push bigger hoops at a slower rhythm. This is true, but really what’s happening here is not about the size of the hoop, it’s the ratio of the hoop to the hooper. For example, my husband and I have the same length legs and are of similar height, but I have a smaller waist than he does.  When he uses my hoop, it’s pretty fast paced for him. If he uses a bigger hoop, we easily can dance to the same beat.

So maybe we ought to be using waist measurement to determine hoop size, not leg length, for our on-body hoops.

Of course we don’t only hoop on our waists. There are off-body tricks, mini hoops and more. Still, the idea of using our bodies to figure out hoop size works in most cases.

I’ve devised some new metrics for hoop sizing for a few different kinds of hoops and hooping styles. They use your own body as the seed for measurements, so your hoops will always fit you well. If you are buying your hoop from a shop, rather than making your own, use your measurements as a guide to find the closest size available.

How to Fit Your Hoop
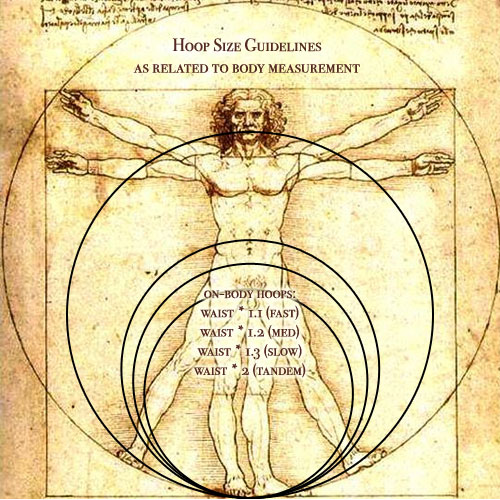
On-Body Hoop: Measure your waist (in centimeters, inches, or whatever you like). Then multiply by the magic number* below depending on your preferred hoop rhythm:

Slow: 1.3
Medium:  1.2
Fast: 1.1

This give you a hoop diameter that might be right for you. This is just a rule of thumb. People who are extra tall or extra short, very stout or  thin might need adjustments.

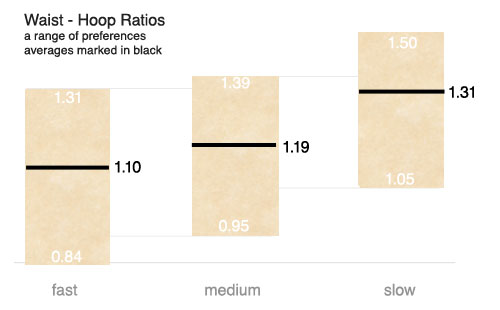
Also, hoop rhythm is subjective. Your fast rhythm might be faster than mine, or maybe it’s slower. It depends on your level of fitness, your creaky joints, how much caffeine you had today, your mood… Use these numbers as a guideline to build your hoop wardrobe and please share your feedback in the comments. A survey of hoopers on Hoop City and Hooping.org (with 20 responses), showed this wide range of size preferences:
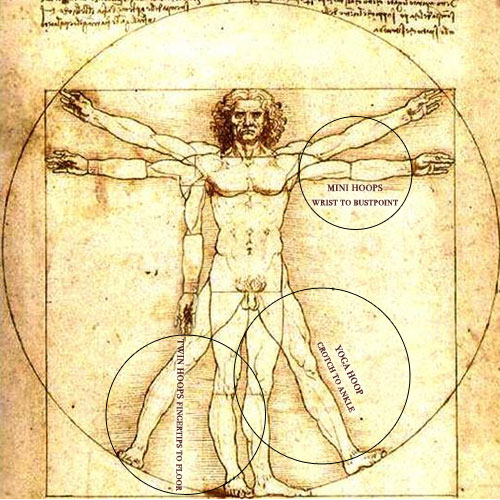
Twin Hoops: With your hand held comfortably at your side, measure from your fingertips to the floor, and subtract an inch (or 3 cm). Use this measurement as your hoop diameter.  This makes hoops that are easy to swing in poi style moves without hitting the ground.

Mini Hoops: With your arm held out to the side, measure from your wrist to just before your armpit. Alternately, for buxom hoopers, hold your arm straight out in front of you and measure from the inside of your wrist to just before the bustpoint. Either way, this produces mini hoops that you can isolate and spin along the inside of your arm without snagging. Smaller is fine, too.

Yoga hoop: Measure your inseam, from crotch to ankle. This allows you to use your hoop as a yoga prop and to do inverted walking meditations without catching on your torso.

Tandem/meditation hoop: Waist measurement multiplied by 2 is a good place to start exploring these ultra-big hoops. This produces a hoop large enough for two to hoop in easily, or an extremely slow rhythm for a solo hooper.

About Weight

Whether you want a weighted hoop or one that is ultra-light is up to you.

Heavier hoops are great for toning muscles and weight adds stability, but they can leave bruises and are sometimes too heavy for faster hoop tricks or tosses. Lightweight hoops are wonderful for long sessions of hand hooping and fast tricks, but they are harder to control because they tend to fly around.

If you have a hoop that is too light, you can add tape to it to make it heavier. If you have a hoop that is too heavy, you can give it to a friend who likes heavy hoops. 🙂

All hoops are good hoops for something! Even the much derided “kiddie hoops from the dollar store” can be fun to play with and make fine hoops for off-body hooping – no bruises – or a good challenge for waist hooping.

* How did I come up with these multipliers?

I did it partially by observation during my hooping experience, and a large part by math.

I calculated some examples of hoop to hooper ratio. I used common hoop sizes as my base, and a range of US dress sizes for my waist measurements. I rounded to two decimal places and averaged the results to get the final magic number.  I also did a survey of hoopers (pictured in the chart above) and incorporated their results into the final number. The larger the magic number, the slower the rhythm. 

As an aside, I noticed some interesting points in doing this math. For example,  a 42″ hoop on a size 40 hooper has about the same ratio (1.20) as a 34″ hoop on a size 10 hooper.  And in the survey, there was huge overlap about what hoop ratio was fast, medium, or slow. Hmmm, no wonder so many new hoopers are confused about hoop size and how fast we should be moving.